Plumbing

Plumbing

How to Unblock a Toilet Fast (& When It’s a Real Emergency)

Water rising to the brim of your toilet bowl is one of the fastest ways to induce panic, but acting quickly can prevent an absolute disaster on your bathroom floor. When you are dealing with a stubborn clog, every second counts, and stopping the flow before it overflows saves you from a costly and messy cleanup. While minor clogs can sometimes be cleared at home, a blocked toilet often signals a deeper, more aggressive plumbing issue that requires professional equipment.  If home remedies fail or the water keeps backing up, don’t risk property damage. Skip the frustration and call the local experts at Townsville Plumbers right away for fast, reliable emergency service. In this article, we’ll teach you how to assess the situation, guiding you step by step on whether you can safely clear it at home or it’s time to call a professional.  Immediate Steps to Prevent Overflow Before tackling the clog, focus on preventing disaster. The worst toilet catastrophes happen when panic leads to repeated flushing, so your first move is stopping the current flush cycle. If your toilet has a standard tank and water is rising, quickly remove the tank lid and lift the float ball to stop the water flow. If you have a modern tankless toilet or flushometer system, bypass the tank entirely and immediately locate the shut-off valve on the wall or near the base.  Turn this valve clockwise to shut off the water supply and prevent refilling. If the valve is stuck or the water won’t stop rising, don’t wait for a catastrophe; call Emergency Plumbing immediately to prevent severe water damage. With water flow stopped, assess the situation. If the bowl is dangerously full, scoop out some water with a container to create working space and reduce overflow risk. While you have this moment of control, prepare your workspace by laying towels around the toilet base, putting on cleaning gloves, and placing a bucket nearby for any water you remove.  If water continues rising despite your efforts, double-check that the supply valve is completely closed. If the valve is broken, leaking, or you can’t stop the water, call a trustworthy plumber.  DIY Steps to Unblock a Toilet Once the water is under control, you can evaluate whether you can clear the blockage yourself. Working through these step-by-step methods helps you triage the situation and decide whether a simple fix will work or you need expert help. Step 1: Use Hot Water + Dish Soap (Best for Soft Clogs) Step 2: Use a Toilet Plunger (The Right Way) Step 3: Use a Toilet Auger (For Stubborn Clogs) When to Call Emergency Plumbers? If you have worked through these DIY triage steps and the clog still won’t budge, forcing it further risks property damage. Instead of struggling, book an emergency appointment and let our licensed professionals restore your plumbing safely. Signs It’s More Than a Simple Clog Not every toilet clog is a one-off issue. If the problem keeps coming back or starts affecting other parts of your plumbing, the blockage likely goes deeper than the toilet itself. Recurring clogs often point to a buildup further down the drain line that isn’t being fully cleared. When multiple fixtures in your home are affected at the same time—such as sinks or showers draining slowly—it typically indicates a main drain or sewer line problem rather than a localized blockage. Watch out for these specific warning signs: Finally, keep in mind that not every perceived “clog” is an actual blockage. Mechanical issues like a weak flush, an incomplete tank refill, or worn-out internal tank parts can prevent the toilet from clearing properly, mimicking a clog when the real culprit is hardware failure. When It’s Time to Call Emergency Plumbers If any of those warning signs are showing up, the problem has moved past a simple DIY fix. Recognizing when a blocked toilet becomes an active plumbing emergency helps protect your home from severe damage. Clear emergency scenarios include: You must stop trying to fix the issue yourself if: When multiple backups, severe sanitation risks, or suspected sewer line issues occur, continuing DIY attempts only worsens the damage. At this stage, calling a professional immediately is the only safe solution. How to Prevent Future Toilet Clogs Once you’ve dealt with the immediate issue or avoided a full emergency, the next step is making sure it doesn’t happen again. Most toilet clogs are preventable with a few simple habits and a bit of preparation. Conclusion When a toilet blocks, staying calm and acting fast is key. Try the basics such as stopping the water, attempting a gentle plunge, or using an auger. But if the clog refuses to budge, keeps returning, or turns into an overflow, it’s time to stop the DIY struggle. Don’t let a blocked toilet disrupt your day or threaten your home. Call Townsville Emergency Plumbers now to book an emergency appointment, and let our licensed professionals restore your plumbing in no time.
Trusted Plumbing Solutions
Plumbing

What to Do When You Have a Plumbing Emergency: Step-by-Step

Plumbing emergencies get worse fast. The first 30 minutes matter because quick action can limit water damage, reduce safety risks, and make the repair simpler when the plumber arrives. This guide covers what to do immediately, what counts as a plumbing emergency, and when to call an emergency plumber in Townsville. A plumbing emergency is any plumbing problem that threatens your home, your health, your safety, or your access to essential water services. That includes burst pipes, sewage backing up, major leaks, water near electrical systems, suspected gas leaks, and sudden loss of water to the whole property. Step 1: Stay Calm and Identify the Immediate Risk Start by working out the risk in front of you. Focus on what is happening right now rather than trying to fix the plumbing permanently. Check for active flooding, sewage, water near power points or appliances, gas smell, sagging ceilings, or a complete loss of water. In Townsville homes, heavy rain and storm conditions can also make leaks spread quickly through ceilings and wall cavities. If the area is unsafe, leave it and get help first. Visible water is only part of the picture. Hidden leaks behind walls, ceiling bulges, and wastewater coming up through drains can become dangerous very quickly. Step 2: Shut Off the Water Supply Turn off the water at the closest isolation valve first if the problem affects one fixture or appliance, such as a toilet, basin, dishwasher, or washing machine. That often stops the flow without shutting down the whole house. If you have a burst pipe, major leak, flooding, or you cannot tell where the water is coming from, turn off the main water supply straight away. In many Townsville homes, the main shutoff sits near the front boundary, beside the water meter, or where the supply line enters the house. After you shut off the water, open a cold tap at the lowest point you can access to relieve pressure and help drain remaining water from the line. Step 3: Protect People From Electrical or Gas Hazards Put safety ahead of cleanup. If water has reached power points, appliances, extension cords, or the switchboard area, stay out of the wet zone. Do not step into pooled water to reach a switch or breaker. If you suspect a gas leak because you can smell gas near a hot water system, kitchen appliance, or gas line, leave the home immediately. Do not use light switches, lighters, garage remotes, or phones inside the house. Call 000 and your gas provider from a safe location. Treat sewage as a health hazard as well. Keep children and pets away, avoid direct contact, and do not try to mop up contaminated wastewater without proper protection. Step 4: Contain the Damage While You Wait Once the area is safe, slow the spread of water. Use buckets, towels, storage tubs, or anything clean enough to catch drips and redirect water away from flooring and furniture. Move rugs, electronics, chargers, small furniture, and personal items out of the wet area. If water is dripping through a ceiling, do not stand under a sagging section or try to cut into plaster unless a licensed professional tells you to do so. A temporary clamp, leak tape, or a firm wrap may slow a small pipe leak, but only use these as short-term measures. They do not replace a proper repair. [Image suggestion: Townsville plumber placing a temporary pipe clamp on a leaking copper pipe under a sink while a bucket catches water.] Step 5: Turn Off Related Systems if Needed Some emergencies involve more than the water supply. If you have turned off the main water and the problem involves the hot water system or nearby pipework, switch off the water heater as well. For electric storage systems, turn off the power at the unit or switchboard only if the area is dry and safe to access. For gas hot water systems, follow the manufacturer shutoff instructions if it is safe, otherwise leave it alone and wait for a licensed plumber or gas fitter. If a sewer or drain line is backing up, stop using sinks, showers, toilets, the washing machine, and the dishwasher. Every extra litre you send into the system can push more wastewater back into the house. This is also the answer to a common question: Should I turn off the water heater during a plumbing emergency? Yes, if the main water supply is off and the water heater or nearby pipework may be affected, shutting it down helps prevent overheating, pressure issues, or further damage. Step 6: Decide Whether It Is a True Plumbing Emergency Some plumbing issues need immediate professional help. Others can wait until morning if you have isolated the problem safely. Problems that usually need immediate professional help Burst pipes, uncontrollable leaks, sewage backups, wastewater coming up through floor drains, water near electrical systems, leaking hot water systems, suspected gas leaks, and no water to the whole property all count as urgent. These issues can damage walls, floors, cabinetry, ceilings, and electrical systems within minutes or hours. They can also create health risks or leave your household without safe water or working sanitation. Problems that may be able to wait until regular business hours A slow drain, a small leak under a sink that stops at the isolation valve, or one blocked toilet that is not overflowing may be able to wait if you have another toilet and the problem is stable. These still need repair, but they may not require an after-hours callout if you can shut off the fixture and keep the area dry and safe. If you are unsure, or the issue is getting worse, call an emergency plumber and ask. This addresses another common question: Can a plumbing issue wait until morning or should I call an emergency plumber? Call immediately if the problem keeps flowing, threatens the property, involves sewage or gas, affects the whole house, or creates an electrical risk. If you can

Plumbing

How to Turn Off Your Water Supply in an Emergency

A burst flexi hose, split pipe, overflowing toilet or failed tap can send water through your home in minutes. When that happens, knowing how to turn off your water supply quickly is what limits damage to flooring, cabinets, walls, electrical fittings, and everything around them. In this guide we’ll walk you through exactly what to do: how to shut off the water safely, where to find the main shut-off valve and what to do right after the water stops. Why Knowing Your Water Shut-Off Point Matters Water damage escalates quickly, especially in North Queensland  where heat and humidity can cause materials to absorb moisture almost immediately. Once water reaches skirtings, cabinetry, wall cavities, or electrical areas, what starts as a small leak can quickly turn into a much larger repair job. Shutting off the water is what gives you control. It’s the first move that stops the situation from getting worse. Knowing your water shut-off point matters beyond emergencies, it’s also essential for routine plumbing work, like replacing a tap, fixing a toilet valve, or changing a dishwasher or washing machine hose, so knowing how to do it properly saves time, avoids unnecessary mess, and gets the job done without delays. Find the Main Water Shut-Off Valve Before anything happens, you need to know exactly where to go. In an emergency, the last thing you want is to be searching for the valve while water is already spreading through the house. Common Locations In most homes, the main shut-off is often located outside rather than inside. Start by checking: Some homes may also have an internal shut-off, commonly found in: Special Setups Not all homes follow the same layout, so the location isn’t always obvious. If You Can’t Find It If the valve isn’t easy to locate: If you still can’t find it, a plumber can locate it for you and clearly label it, so you’re not guessing during an emergency. Start With Safety Before You Touch the Valve Before you go to shut off the water, take a moment to make sure it’s safe to do so. In some situations, the risk is what the water is coming into contact with. If Water Is Near Electricity If water has reached power points, appliances, extension cords or the switchboard, treat that as the immediate risk. Do not step into wet areas to try and shut off the water if there’s any chance electricity is involved. If the area feels unsafe, keep your distance and contact emergency services or a licensed professional first. If the Valve Is Stuck or Corroded If the shut-off valve feels seized, heavily rusted or unstable, avoid forcing it. Older valves can fail under pressure, which can create a second leak right when you’re trying to stop the first one. In that situation, it’s safer to call a plumber than risk making the problem worse. How to Turn Off the Main Water Supply Once you’ve located the valve and made sure everything is safe, the next step is to shut it off as quickly as possible. Start by making sure you’re using the main shut-off valve, not a branch line that only feeds one part of the house. If the water keeps running after you turn it, you may have the wrong one. To shut it off: After that, test it by opening a nearby tap. The water should slow down and then stop as the pressure drops. To finish, open one or two taps at a low point in the house to drain any remaining water in the pipes. This helps relieve pressure and reduces the chance of further leaking while repairs are being handled. When to Shut Off One Fixture Instead Not every plumbing issue requires turning off water to the entire house. If the problem is clearly isolated, you can often stop it at the source by shutting off a single fixture. This way you can control the issue quickly while keeping water running in the rest of the home, making it the most practical option for smaller, contained problems. Finding Fixture Valves Local shut-off valves are usually easy to access and are designed to isolate individual fixtures. You’ll typically find them: They work the same way as the main valve, either turning a handle clockwise or rotating a lever to the off position. But if you’re unsure, it’s always safer to shut off the main supply and take control of the situation. How to Turn Water Back On Safely Once repairs are complete, it’s important to bring the system back on slowly and under control. Start by closing any taps you opened during draining. Then gradually turn the main valve back on, allowing pressure to build up without putting stress on the pipes. Keep an eye on the repair area and any exposed pipework as the water returns. If you notice drips or anything unusual, shut the water off again and check the issue before continuing. To finish, run a few taps and fixtures around the house to make sure everything is working normally and the pressure has stabilised. Conclusion Knowing how to turn off your water supply is one of the simplest but most valuable emergency skills you can have. When something goes wrong, the priority is clear: find the valve, shut the water off, and take control of the situation. Acting quickly makes all the difference. Even a fast, simple response can limit damage, reduce repair costs, and make the entire process easier to manage. If you’re dealing with a plumbing issue you can’t safely handle or need urgent help, contact Townsville Emergency Plumbers to get the problem sorted quickly and prevent further damage.

Blocked Drains & Water Leaks
Plumbing

Blocked Drain Emergency: Causes, Quick Fixes & When to Call a Plumber

That slow-draining sink you’ve been ignoring could become tomorrow’s emergency flood. When water starts pooling or backing up, you’re already in the danger zone, so acting quickly can save you from much bigger water damage and costly repairs. Here in Townsville, your drains face unique challenges. Our heavy seasonal rains, aging infrastructure in established neighborhoods, aggressive tree roots, and high household water usage create perfect conditions for minor blockages to quickly become major problems affecting your entire home. This guide gives you a clear action plan:  how to identify what’s actually causing your blockage, and practical DIY solutions that work (plus when it’s time to call in our emergency plumbing team instead of making things worse). What causes a blocked drain? Your blocked drain didn’t appear overnight, it’s been building up gradually through everyday use. To tackle your clog effectively, you need to identify what’s going down your particular drain. In your bathroom, we typically find hair, soap scum, and hardened toothpaste creating stubborn blockages. Kitchen drains suffer from cooking oils, food particles, and coffee grounds that coat pipe walls and restrict water flow. Toilet blockages operate differently, with excessive toilet paper, wet wipes, and inappropriate items causing rapid clogs. Understanding your specific fixture helps you address the problem correctly. The location of your blockage also determines your next steps. A local clog near the drain opening or in the trap will affect just one fixture and can often be resolved with household tools. Deeper blockages further down your plumbing system create different symptoms, multiple slow drains, unexpected water pooling, or backups in lower-level fixtures. These situations typically require more advanced solutions. Recurring blockages in the same drain point to underlying issues that need addressing. Here in Townsville, invasive tree roots commonly penetrate underground pipes, creating collection points for debris and ongoing blockages. Aging or damaged pipes with cracks or shifts also cause persistent problems, especially given our local heavy rainfall and soil movement conditions. When you’re repeatedly clearing the same drain, you’re dealing with a systemic issue that needs professional attention, not just a simple clog. Signs a blocked drain is becoming an emergency Early warning signs usually show up in how water behaves. You might first notice water draining slower than normal or pooling in your basin or shower. Listen for gurgling sounds after using a sink, toilet or floor waste, these warnings occur when trapped air struggles through a partially blocked pipe. Don’t ignore unpleasant smells either, as they typically indicate waste and stagnant water collecting inside your pipes. These early signs provide a critical window for you to act while the blockage remains local and easier to manage. The situation becomes more serious when the problem affects multiple fixtures. If you flush your toilet and water backs up into your shower, or if several drains slow down simultaneously, you’re facing a deeper system blockage. Strong sewage odors inside your home are another serious indicator. When wastewater begins rising through a floor waste or outside gully, consider it urgent , your main drain is likely affected, not just an isolated trap. When noticing these red flags, immediately reduce your water usage. Limit toilet flushing, ensure taps are completely off, and avoid running appliances like dishwashers or washing machines. Additional water entering a blocked system increases pipe pressure, which can lead to overflows, contaminated backups, and costly damages. What to do first when you discover a blocked drain When facing a blocked drain, your first move should be to control the situation, not reach for tools. Turn off taps and stop using water in the affected area immediately to prevent the blockage from worsening while you assess the problem. Pay special attention to fixtures at the lowest points of your home, such as downstairs showers or floor wastes, as these typically show signs of deeper blockages first. Once you’ve stopped the water, determine if you’re dealing with a localized or system-wide issue. A single slow-draining fixture usually indicates a local clog you can handle yourself, while multiple affected fixtures point to a deeper problem in your main line. Quick fixes to try before calling a plumber Once you’ve checked where the problem is coming from you can tackle it yourself with these straightforward solutions before reaching for the phone. Remove visible debris manually When you’re facing a surface-level blockage, start with the simplest solution. Many bathroom drain clogs form when hair wraps around the stopper or builds up just beneath the strainer. You’ll want to put on gloves before attempting removal, or grab a pair of long-nose pliers for better reach. As you extract the debris, pull slowly and dispose of it directly in a bin, never rinse it back down as this will only recreate the blockage you’re trying to solve. Take care during this process, as hasty movements can damage your drain components or push the clog deeper into your plumbing. If you can’t easily reach the debris or it feels tightly compacted, it’s time to  stop and move to other methods. Use a plunger correctly If removing surface debris doesn’t fully restore the flow, the next step is to apply pressure to the blockage rather than trying to pull it out. Your trusty plunger is usually the most effective tool for minor blockages in toilets, sinks or showers. Choose the right type for the fixture, make sure there’s enough water to cover the rubber cup, and create a tight seal before you start.  Success here comes down to technique, not force. So, apply steady, rhythmic pressure rather than forceful, erratic pumping. You’ll likely need several attempts before you feel the clog beginning to give way. Once water begins draining, test the flow with a small amount of water first. Wait to confirm proper drainage before running full water or flushing normally to avoid overwhelming a partially cleared pipe. Try a drain snake or auger for deeper clogs If plunging doesn’t clear the blockage, the next step is to reach a little further down the

Plumbing

No Hot Water? What to Check Right Now, and When to Call a Plumber

Turning on the tap expecting a warm shower and getting hit with cold water is frustrating, especially when you don’t know if it’s a quick fix or a bigger problem. The good news is most “no hot water” situations follow a pattern. Before you call a plumber, you can run a few simple checks to figure out whether the issue is minor, system-related, or something that needs professional help. Check the basics first (power, gas, supply) Before assuming the system has failed, start with the simplest checks. Most “no hot water” issues come down to something small and easy to miss, so it’s worth ruling these out first before moving on. If everything else in the house is working as expected but hot water isn’t, you’ve already narrowed the problem down significantly. If you do find something off, you can take a simple next step. Reset the breaker once, or relight the pilot if you’re comfortable doing it safely. In many cases, that’s enough to restore hot water. But don’t keep retrying if it doesn’t hold. If the breaker trips again or the pilot won’t stay lit, that usually points to a deeper fault. At that stage, it’s better to stop and call a plumber rather than push the system further. Check if it’s the whole house or just one fixture Once you’ve ruled out basic supply issues, the next step is to figure out how far the problem reaches. This quickly tells you whether you’re dealing with the system itself or something more local. Take a moment to test a few different taps around the house. If hot water works everywhere except one spot, there’s no need to troubleshoot the heater. But if nothing is getting hot, you know the issue sits at the system level. This quick check keeps you focused on the right fix and avoids wasting time on the wrong one.  Check the thermostat settings If the system has power and the issue affects the whole house, the next thing to check is whether it’s actually heating to the right temperature rather than not heating at all. In both cases, the system can appear to be working, but the water never gets hot enough. Start by checking the current setting and adjusting it if needed (typically around 60°C for safety and performance). After making a change, give the system some time to reheat before testing again. If nothing changes, don’t keep adjusting it. At that point, the problem is likely inside the unit, such as a faulty thermostat or another internal component, and it’s better to move on or call a plumber. Look for leaks around the system If the settings look right but performance still isn’t, the next step is to check for anything physically affecting the system. Leaks are a common cause and can quickly turn a simple issue into a bigger one. Check: Even a small leak can reduce efficiency or signal internal damage, so it’s worth taking a close look. If you do find water, act early. Turn off the supply to limit further damage and avoid running the system unnecessarily. Leaks rarely resolve on their own. In most cases, this is where DIY stops and a plumber needs to step in before the problem spreads. Consider sediment build-up If everything looks fine on the surface but performance is still off, the issue may be building up inside the tank rather than something you can see. Over time, mineral deposits settle at the bottom, especially in areas with harder water. This can cause: In this case, the system isn’t necessarily broken, it’s just struggling to work through the buildup. Flushing the tank can help restore performance, but it’s not always a straightforward DIY job, especially if the system hasn’t been maintained regularly. If you suspect sediment buildup or haven’t serviced the unit in a while, it’s usually safer to have a plumber handle it properly. When to call a plumber If you’ve worked through the basic checks and the problem still isn’t clear, this is where troubleshooting should stop. At this point, continuing to test things yourself usually doesn’t fix the issue, and can make it worse. Call a plumber if you notice: These signs usually point to something happening inside the unit, whether it’s a failed element, a faulty valve, gas control issues, or general system wear. Once it reaches that stage, proper diagnosis matters more than guesswork. A plumber can identify the exact cause and fix it before it turns into a bigger repair. Conclusion Losing hot water feels urgent, but the key is knowing how far to take it yourself. The goal isn’t to fix everything on the spot, it’s to quickly figure out whether you’re dealing with something simple or something that needs proper repair. Once you’ve narrowed it down, you avoid wasted time, unnecessary stress, and the risk of making the issue worse. That’s what turns a frustrating situation into a controlled one. If you need fast, reliable help, call  Townsville Emergency Plumbers to inspect the issue, diagnose it properly, and get your hot water back up and running.

Plumbing

Burst Pipe Emergency: What to Do Before the Plumber Arrives

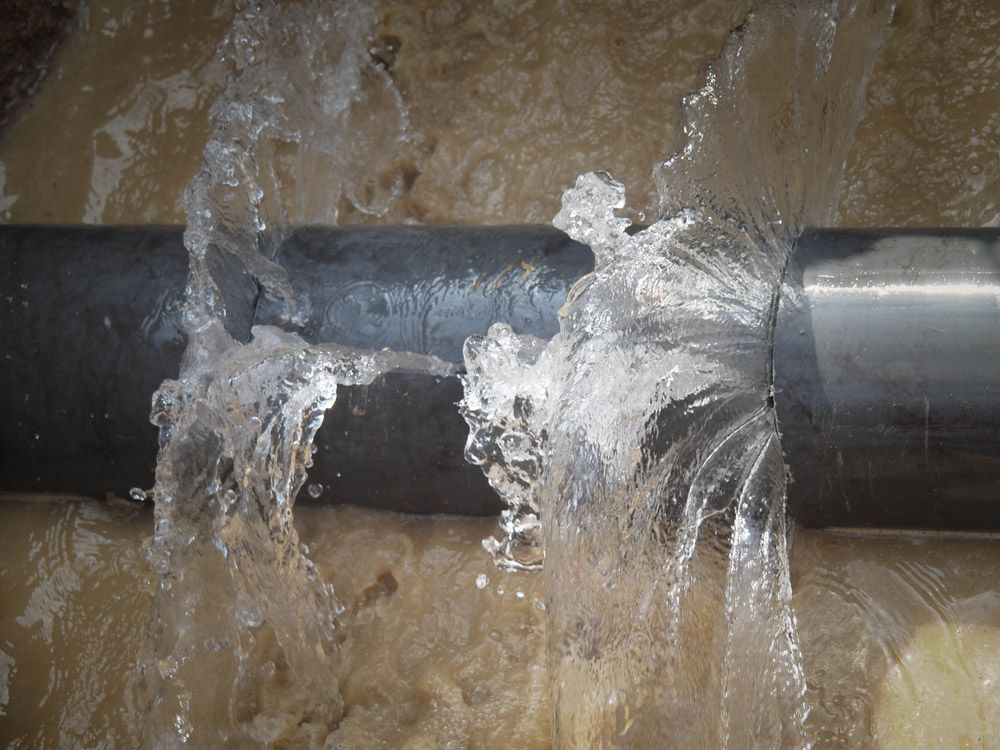
A burst pipe doesn’t give you time to think, it just starts flooding your home. One minute everything is fine, the next you’re dealing with water spreading across floors, soaking walls, and potentially damaging everything in its path. It’s stressful, messy, and easy to panic. But what you do in the first few minutes matters more than anything that comes after. The good news is you don’t need to fix the pipe yourself. Your job is much simpler.This guide walks you through exactly what to do before the plumber arrives, step by step, so you can protect your home, avoid making the situation worse, and help speed up the burst pipe repair when help gets there. Stop the Water Flow Every second the water keeps running, the damage gets worse. This is the one step that has the biggest impact on how bad, and how expensive, this situation becomes. Your first move is to shut off the main water supply. This is what actually stops the flooding and prevents further damage. The shutoff valve is usually located near the water meter, in the garage, along an exterior wall, in the basement, or in a crawl space. As soon as you find it, turn it off completely. If you can’t locate the valve quickly or it won’t turn, don’t waste time trying to figure it out. Call an emergency plumber right away. Letting water continue to flow, even for a few extra minutes, can significantly increase structural damage, cleanup time, and the overall cost of it all. Prioritize Safety First Once the water is under control, or at least no longer actively flooding, the next step is making sure the area is safe to be in. It’s tempting to jump straight into cleanup, but this is where a lot of people put themselves at risk without realizing it. Water and electricity are a dangerous combination, so take a moment to look for warning signs before stepping in. If you see water near outlets, appliances, breaker panels, or leaking through ceilings around light fixtures, treat the area as unsafe. Don’t step into standing water and don’t touch switches or electrical devices in wet zones. If there’s any doubt at all, stay out and call for professional help. At the same time, keep everyone else away from the affected area. Limiting access helps prevent slips, shocks, and accidental damage, especially if the burst happened inside walls, ceilings, or near utility connections where the structure may already be weakened. Drain the System and Relieve Pressure Once you’ve confirmed the area is safe to be in, the next step is reducing any remaining water still sitting inside your plumbing system. Even after the main supply is off, trapped water can continue leaking from the damaged section. Start by opening cold taps around the house. This helps release built-up pressure and allows leftover water to drain out, which can slow or stop the leak at the break point. At this stage, avoid the urge to “test” the system. Don’t keep flushing toilets or running fixtures unnecessarily, as that can push more water through already weakened pipes. The goal here is simple: drain what’s left, not move more water around. If freezing may have caused the burst, keep in mind that other sections of pipe could still be vulnerable. Avoid aggressive DIY thawing methods like high heat or open flames. Leave it for the plumber to assess properly. Limit Water Damage  With the system drained and pressure reduced, you can now focus on limiting how much damage the water actually causes. This is where small, practical actions can make a big difference, just don’t overdo it or put yourself at risk. Start by moving and protecting the most vulnerable items. Electronics, fabrics, paper goods, and wood furniture should come first, since they absorb water quickly and are often harder (or more expensive) to replace. Getting them out of the affected area early can prevent a lot of unnecessary loss. Next, do some basic containment. Use towels, buckets, mops, or a wet/dry vacuum if it’s safe to do so. The goal isn’t to fix the problem, just to slow the spread of water and protect floors and walls while you wait for the plumber. Once the active water is under control, improving airflow can help reduce lingering moisture. Opening windows or using fans can make a difference, but only if the area is completely safe. Avoid using any electrical devices in wet zones unless you’re sure there’s no risk. Temporary Fixes — What’s Actually Worth It At this point, with the water off and the situation under control, you might be wondering if there’s anything you can do to temporarily stop the leak. In some cases, a quick fix can help, but only if it’s done safely and for the right reasons. A temporary patch can make sense if the pipe is exposed, accessible, and no longer under pressure. Using pipe repair tape, a clamp, or a wrap can help slow a small leak and reduce dripping while you wait for the plumber. Just think of this as buying time, not solving the problem. What you want to avoid is anything that could make the situation worse. Don’t try soldering, don’t use heat guns on pipes, and don’t start opening walls to “find the problem.” And never attempt to work on a pipe that still has pressure in it. The wrong move here can easily turn a manageable issue into a much bigger and more expensive repair. Call the Plumber Once things are stable, don’t delay getting a professional on the way. The sooner a plumber knows what’s going on, the faster they can respond. When you call, give clear, useful information. Let them know where the pipe burst, whether the water has been shut off, if there are any electrical risks, and what may have caused the issue: like freezing temperatures, or sudden pressure changes. The more accurate the details, the easier it is for them

Plumbing

How to Unblock a Toilet Fast (& When It’s a Real Emergency)

When a toilet won’t flush properly, panic sets in fast: that rising water level threatening to overflow onto your bathroom floor. Fortunately, most blockages can be resolved quickly at home without creating a disaster.  Townsville homeowners face this common plumbing issue year-round, but understanding the problem is the first step toward a solution. Different blockages require different techniques and recognizing what you’re dealing with saves time and prevents damage to your plumbing system.  When home remedies fail, however, it’s time to call professionals, the following advice will guide you through both DIY solutions and when to reach for the phone. Immediate Steps to Prevent Overflow Before tackling the clog, focus on preventing disaster. The worst toilet catastrophes happen when panic leads to repeated flushing, so your first move is stopping the current flush cycle. If water is already rising, quickly remove the tank lid and lift the float ball to halt water flow, then locate and turn off the water supply valve near the toilet’s base to prevent any refilling. With water flow stopped, assess the situation. If the bowl is dangerously full, scoop some water out with a container to create working space and eliminate overflow risk. While you have this moment of control, prepare your workspace by laying towels around the toilet base, putting on cleaning gloves, and positioning a bucket nearby for any water removal, these small preparations make the entire process significantly less stressful. If water continues rising despite your efforts, double-check that the supply valve is completely closed and, if necessary, manually hold up the float mechanism inside the tank. DIY Steps to Unblock a Toilet Once the water is under control, you can move on to actually clearing the clog. The key here is to start with the simplest, most effective method and only move to more advanced options if needed. Most toilet blockages can be resolved with basic tools, as long as you use them correctly. Step 1: Use Hot Water + Dish Soap (Best for Soft Clogs) If you want to start with the least aggressive option, this is the safest method to try. It works best on softer clogs that can be broken down or loosened enough to slide through the pipes. This approach is most effective for toilet paper buildup or organic waste, where the issue isn’t a solid obstruction but material that’s stuck and needs to soften. Start by adding a generous amount of dish soap into the bowl. The soap helps lubricate the pipes and break down the clog. Then carefully pour in hot water; make sure it’s hot, but not boiling, as boiling water can crack the porcelain. Pour from waist height to add a bit of pressure without splashing. Let the mixture sit for several minutes to give it time to work. In some cases, you’ll start to see the water level slowly drop on its own. Once it looks like the clog has loosened, test with one gentle flush. Keep in mind that this method works better on slow-draining toilets than on fully blocked ones, and it may take a bit of time to have an effect. If nothing changes, it’s a sign you’ll need to move on to a more direct tool. Step 2: Use a Toilet Plunger (The Right Way) A plunger is still one of the fastest and most reliable ways to unblock a toilet, but only if you’re using the right type. A flange plunger (the one with an extended rubber flap) is designed specifically for toilets and creates a proper seal. A standard flat plunger made for sinks won’t work as effectively and often leads to frustration. Before you start, make sure there’s enough water in the bowl to cover the rubber head. This is what allows pressure to build. Place the plunger over the drain and create a tight seal, then use controlled push-and-pull motions. The goal isn’t aggressive force, it’s consistent pressure without breaking the seal. Work in short cycles, keeping the movement steady. After several attempts, you may notice the water level dropping or the bowl starting to drain more normally. That’s your sign the clog is loosening. Once it seems clear, test it with one careful flush only. If the water flows normally, you’re done. If not, stop and move to the next method, don’t keep flushing and risk an overflow. Step 3: Use a Toilet Auger (For Stubborn Clogs) If the clog isn’t clearing with softer methods or a plunger, it’s time to use a more direct tool. A toilet auger (also called a closet auger) is the most effective DIY option for stubborn blockages and is specifically designed to work inside toilets without damaging the porcelain. To use it safely, insert the auger gently into the bowl and guide it toward the drain. Once it reaches resistance, rotate the handle to either break up the clog or hook onto it. Avoid forcing it: steady, controlled movement is what prevents scratches or damage. When you feel the blockage give, slowly pull the auger back out. This method works best for deeper clogs or objects that are lodged further down the trap, where a plunger can’t reach. If the toilet starts draining normally after this, test with one careful flush. If not, it may be a sign the issue goes beyond a simple blockage. Signs It’s More Than a Simple Clog Not every toilet clog is a one-off issue. If the problem keeps coming back or starts affecting other parts of your plumbing, it’s usually a sign that the blockage goes deeper than the toilet itself. If you’re dealing with recurring clogs, there may be a buildup further down the drain line that isn’t being fully cleared. And if multiple fixtures in your home are affected at the same time, like sinks or showers draining slowly, that often points to a main drain or sewer line problem rather than a localized clog. There are also a few warning signs to pay attention to. Gurgling sounds

Plumbing

Burst Pipe Emergency: Steps to Take Before the Plumber Arrives

Burst Pipe Emergency: Steps to Take Before the Plumber Arrives 1 A burst pipe is one of those household emergencies that can go from manageable to overwhelming in a matter of minutes. What starts as a small crack or sudden leak can quickly turn into spreading water, damaged belongings, and growing safety risks. In moments like this, uncertainty often makes the situation feel worse: Should you try to fix it? Call someone first? Turn things off? Leave the area? The most important thing to understand is that you don’t need plumbing experience to respond correctly. The goal during a burst pipe emergency is not to repair the pipe yourself, but to take a few immediate actions that reduce danger and slow damage until a licensed plumber arrives. The sections ahead are designed to be followed in order, because when you focus on one clear action at a time, a stressful emergency transforms into something you can handle. Step 1: Secure Safety and Stop the Flow Scan for Immediate Hazards Before reaching for valves or trying to control the water, take a few seconds to assess the situation around you. A burst pipe can create more than just water damage, it can introduce electrical risks, slipping hazards, and even structural concerns depending on where the leak occurs. Start by identifying how severe the leak is. Is water actively spraying under pressure, or is it dripping or flowing steadily? A spraying pipe usually means higher pressure and faster flooding, which makes quick action especially important. However, even slower leaks can spread behind walls or ceilings and cause hidden damage. As you look around, check for warning signs that may change how you respond: These clues help you decide whether it’s safe to stay in the area or whether you should step back immediately. A simple rule applies here: people come first, property comes second. No belongings are worth risking injury. If you suspect electrical danger, notice ceiling movement, or feel unsure about the safety of the space, leave the affected area right away and keep others out until conditions are safer. Taking this brief hazard scan helps you act with clarity instead of urgency alone, setting the stage for the next critical step: stopping the water flow. Shut Off the Water Supply Once you’ve confirmed the area is safe to approach, the next priority is stopping the flow of water. The faster you shut off the supply, the more damage you can prevent. Even a few extra minutes of running water can significantly increase cleanup and repair costs. In most situations, the quickest and most effective action is turning off your home’s main water shutoff valve.  Common places to find the main shutoff include: Shutoff valves typically come in two styles. A lever-style valve turns off with a simple quarter turn until the handle is perpendicular to the pipe. A wheel-style valve requires several clockwise turns until it stops. Either type should close firmly without forcing it. If the burst pipe is clearly isolated, for example, under a sink or behind a toilet, you may be able to shut off a smaller fixture valve instead. However, if there is any uncertainty about where the leak originates, turning off the main supply is the safest choice. If you can’t immediately locate the main shutoff, don’t panic. Check near the water heater or along exterior walls where plumbing enters the property. While continuing to contain spreading water, you can also call an emergency plumber or your local water utility for guidance. Many professionals can walk you through likely locations over the phone while help is on the way. Stopping the water is often the single action that makes the biggest difference in limiting damage, and once it’s done, the situation usually becomes far more manageable. Handle Electricity Safely After the water supply is under control, the next concern is electrical safety. Water on its own causes damage, but water combined with electricity creates the most immediate danger during a burst pipe emergency. Even small amounts of moisture can energize nearby surfaces or equipment, increasing the risk of shock. If water has reached areas with electrical components, shutting off power can reduce risk, but only if it can be done safely. Use your home’s breaker panel to turn off electricity to the affected area, or the entire home if necessary, only when you can reach the panel without stepping through water. There are two important boundaries to follow: If accessing the panel requires crossing flooded flooring or entering an unsafe area, leave the power on and wait for professionals. Emergency responders or electricians have protective equipment designed for these situations. Use extra caution if water is near: These systems can carry electricity even when they appear inactive. When in doubt, keep distance and prevent others from entering the area until it has been assessed safely. Taking a moment to address electrical risks helps ensure that damage remains a property issue, not a personal safety emergency, as you move into the next steps of limiting pressure and slowing further water spread. Step 2: Reduce Pressure and Limit Damage Drain the Plumbing System Even after the main water supply is turned off, water doesn’t immediately stop moving through your pipes. The plumbing system still holds pressurized water, and that remaining pressure can continue forcing water out through the damaged section. Draining the system helps relieve that pressure and slows ongoing leakage. Start by opening cold water taps at the lowest level of your home, such as a basement sink or ground-floor faucet. This allows gravity to help pull remaining water out of the pipes. Once the cold water flow begins to slow, open hot water taps as well to empty the hot-water lines. Flushing toilets can also help release trapped water from the system, further reducing pressure inside the pipes. Draining the plumbing system doesn’t repair the damage, but it reduces internal pressure, which can: Once pressure is relieved, the situation often stabilizes enough for you

Plumbing

Gas Leak Emergency: What to Do and Who to Call

Few household situations create anxiety as quickly as the smell of gas. Whether it’s a faint unusual odour or something suddenly strong and unmistakable, uncertainty can set in fast: Is this dangerous? Should I leave? Am I overreacting? In situations like this, the safest approach is simple: treat a suspected gas leak as real until trained professionals confirm otherwise. Gas leaks are time-sensitive because even small amounts of escaping gas can create safety risks if ignored. The good news is that you don’t need technical knowledge to respond correctly. Taking a few clear, practical actions right away can greatly reduce danger and help emergency responders handle the situation quickly and safely. This guide walks you through exactly what to do if you suspect a gas leak, including the immediate steps to take, what not to do,and  who to contact for help. Each section is designed to remove guesswork so you can focus on protecting yourself and the people around you. When you know the right steps, a stressful moment becomes much more manageable.  Signs of a Gas Leak Gas leaks are not always obvious, and in many cases people notice something feels “off” before they can clearly identify the problem. Recognizing the common warning signs can help you act quickly, but it’s important to remember that you should leave first and confirm later. You do not need absolute proof to treat a situation as a potential emergency. Smell The most widely recognized sign of a gas leak is a strong rotten egg or sulfur-like odour. Natural gas itself is odorless, but utility companies add a chemical scent to make leaks easier to detect. Sometimes the smell is obvious and persistent, while in other cases it may be faint, come and go, or only appear in certain rooms. Even a mild or intermittent gas odour should be taken seriously, especially if it appears suddenly or has no clear explanation. Sounds Unusual sounds near gas appliances, pipes, or outdoor service lines can also signal escaping gas. People often describe hearing: These noises may indicate gas escaping under pressure and should never be investigated closely indoors. Visible Outdoor Signs Gas leaks don’t always occur inside the home. Outdoor lines can also be damaged or disturbed, and visual clues may appear around your property or nearby areas, such as: These signs suggest gas may be escaping underground and require immediate reporting. Physical Symptoms In some situations, people notice physical effects before identifying a smell or sound. Possible symptoms of gas exposure include: If anyone begins feeling unwell while a gas leak is suspected, leave the area immediately and seek fresh air. Even if you are unsure whether the signs truly indicate a gas leak, the safest response is always the same: exit the area first and allow professionals to investigate afterward. Waiting to confirm the source can increase risk, while early action helps keep everyone safe. What To Do If You Smell Gas Indoors If you suspect a gas leak inside your home, this is not the moment to diagnose the problem or try to fix it. These are the safest and most effective responses. Evacuate People and Pets Leave the home immediately and make sure everyone exits together, including pets. Do not pause to gather belongings, open cupboards, or search for the source of the smell. Personal items can be replaced, your loved ones cannot. Move calmly but without delay, guiding children, older family members, or anyone needing assistance toward the nearest exit. Move to a Safe Distance Once outside, continue moving away from the building rather than stopping near entrances. Stay clear of doors, garages, and areas where gas meters or external appliances may be located, as gas can accumulate around these points. Choose a location a safe distance from the structure where everyone can remain together while waiting for help. Do Not Investigate the Source It can be tempting to look for where the smell is coming from, especially if it seems minor. However, attempting to locate the leak indoors increases exposure risk and may unintentionally create unsafe conditions. Avoid opening panels, checking appliances, or attempting any form of repair. Identifying and handling gas leaks requires trained professionals. If the Leak Is Suspected Outdoors If you notice signs of a gas leak outside, such as a strong odour, unusual sounds, or visible ground disturbance, move away from the area immediately. Create distance between yourself and the suspected source, and alert others nearby as you leave if it can be done quickly and safely. Avoid starting vehicles, lawn equipment, or any machinery close to the area, as engines and ignition systems can introduce additional risk. Once everyone is safely away, the next step is contacting emergency services or the gas utility from a secure location. What NOT to Do During a suspected gas leak, some everyday actions can unintentionally create ignition sources. Natural gas and LPG are highly flammable, and when gas accumulates in an enclosed space, even a tiny spark can trigger ignition. Understanding what to avoid helps reduce risk while professionals are on the way. Avoid Anything That Can Create a Spark Electrical devices can generate small internal sparks when switched on or off, something you normally never notice but becomes dangerous in a gas-filled environment. Avoid touching: Even routine actions like turning on a light while leaving can introduce enough energy to ignite accumulated gas. No Flames or Heat Sources Open flames and heat sources present an obvious ignition risk and should never be used during a suspected gas leak. Do not use: Gas concentrations can spread beyond the area where the smell is strongest, meaning ignition could occur unexpectedly. Phone and Electronics Guidance Mobile phones and electronic devices should not be used inside or close to the suspected leak area. While the risk from modern devices is low under normal conditions, emergency guidance prioritizes eliminating all possible ignition sources. Wait until you are safely outside and a reasonable distance from the building before making calls or using

Plumbing

24 Hour Plumber Townsville: When You Need Help Fast

24 Hour Plumber Townsville: When You Need Help Fast 1 Is This a Plumbing Emergency? 1 What To Do Immediately While Waiting 2 Shut Off Water 2 Make The Area Safe 2 Reduce Damage Safely 3 Common After-Hours Plumbing Problems 3 Blocked Drains And Toilets 3 Burst Pipes And Major Leaks 4 Hot Water System Failures 4 Stormwater And Roof Leaks 4 Calling A 24/7 Plumber: What To Expect 4 Questions You’ll Be Asked 5 Response Times And Arrival 5 After-Hours Pricing Explained 5 It usually happens at the worst possible time. A pipe bursts late at night, the toilet begins overflowing just before guests arrive, or you step into the shower only to discover there’s suddenly no hot water. Plumbing emergencies rarely wait for business hours, and the stress they create can make it difficult to know what to do first. In moments like these, the priority is stopping further damage and making the situation safe while professional help is on the way. Taking a few calm, practical steps early can prevent water damage, reduce repair costs, and give you control over what feels like a chaotic situation. A Townsville Emergency Plumber is an on-call professional available outside normal working hours, including nights, weekends, and public holidays. Their role is to respond quickly to urgent problems, make the area safe, and stabilize the issue until a full repair can be completed if needed. Understanding how these services work, and what actions to take before they arrive, helps you move from panic to practical problem-solving when time matters most. Is This a Plumbing Emergency? Not every plumbing problem requires an immediate call-out, but knowing the difference between an inconvenience and a true emergency can save both time and costly damage. In practical terms, a plumbing emergency is any situation that poses an immediate risk to your property, your safety, or basic sanitation within your home. Problems involving uncontrolled water are the clearest example. A burst pipe, rapidly spreading leak, or fixture that continues overflowing despite attempts to stop it can quickly lead to structural damage, electrical hazards, and mould growth if left unattended. Sewage backups are equally urgent, as contaminated water introduces health risks and should be handled professionally as soon as possible. Certain warning signs should always be treated seriously. A strong gas smell near appliances or pipework requires immediate action and professional assessment, while water stains spreading across ceilings or walls often indicate hidden leaks that can weaken building materials over time. These situations rarely improve on their own and tend to worsen the longer they are ignored. Other issues, while frustrating, can usually wait until normal business hours. A slow-dripping tap, minor leak contained in a bucket, or reduced water pressure without visible damage typically does not require an after-hours response. However, conditions can change quickly, and small problems sometimes signal larger issues developing behind walls or underground. When in doubt, it’s safer to act early rather than wait for visible damage to escalate. Paying attention to warning signs: rising water levels, unusual noises in pipes, persistent dampness, or unpleasant odours, allows you to address the problem before it turns into a larger emergency. What To Do Immediately While Waiting When a plumbing emergency happens, the goal is not to fix everything yourself. Your priority is to slow or stop the damage, make the area safe, and prepare the situation for a professional repair. Shut Off Water The fastest way to limit damage during most plumbing emergencies is stopping the flow of water. Locate your home’s main water shutoff valve and turn it clockwise until fully closed. This valve is commonly found near the water meter, outside along a wall, or under the kitchen sink depending on the property layout. If the issue is isolated to a single fixture, such as a toilet or basin, you may be able to use a nearby isolation valve instead. These smaller shutoffs allow you to contain the problem without turning off water to the entire home. Cutting the water supply quickly prevents continuous flooding, reduces pressure on damaged pipes, and buys valuable time while waiting for professional assistance. Make The Area Safe Once water flow is controlled, focus on safety. Water and electricity are a dangerous combination, so switch off power at the main switchboard if water is near outlets, lighting, or appliances. Avoid stepping into standing water until you are certain electrical risks have been removed. Clear pathways around the affected area to reduce slipping hazards, especially on tiled or polished floors. If sewage or contaminated water is present, keep people and pets away and avoid direct contact whenever possible. Basic precautions at this stage help protect both occupants and the technician who will be working in the space. Reduce Damage Safely With immediate risks addressed, take simple steps to limit further damage without attempting complex repairs. Place towels, buckets, or containers beneath active leaks to capture water and prevent spreading. Move furniture, rugs, electronics, and valuables away from damp areas whenever it is safe to do so. Photograph visible damage and the source of the issue if possible. These images can assist with insurance claims and give your plumber useful context before work begins. Avoid temporary fixes that require dismantling pipework or using strong chemicals. Well-intentioned DIY repairs can sometimes worsen the problem or make professional diagnosis more difficult. At this stage, containment and safety matter far more than attempting a permanent solution. Common After-Hours Plumbing Problems Many plumbing emergencies follow predictable patterns. Understanding what commonly goes wrong, and why, helps explain why certain problems require fast professional attention, especially outside normal business hours. While the visible symptom may seem sudden, most emergencies develop from underlying issues that worsen over time until they can no longer be ignored. Blocked Drains And Toilets Blocked drains and overflowing toilets are among the most frequent after-hours callouts. These problems typically develop from gradual buildup inside pipes, including excess toilet paper, non-flushable wipes, grease, or foreign objects. In outdoor systems, tree

Scroll to Top