Plumbing

Plumbing

Septic Tank Maintenance: Simple Habits That Prevent Backups

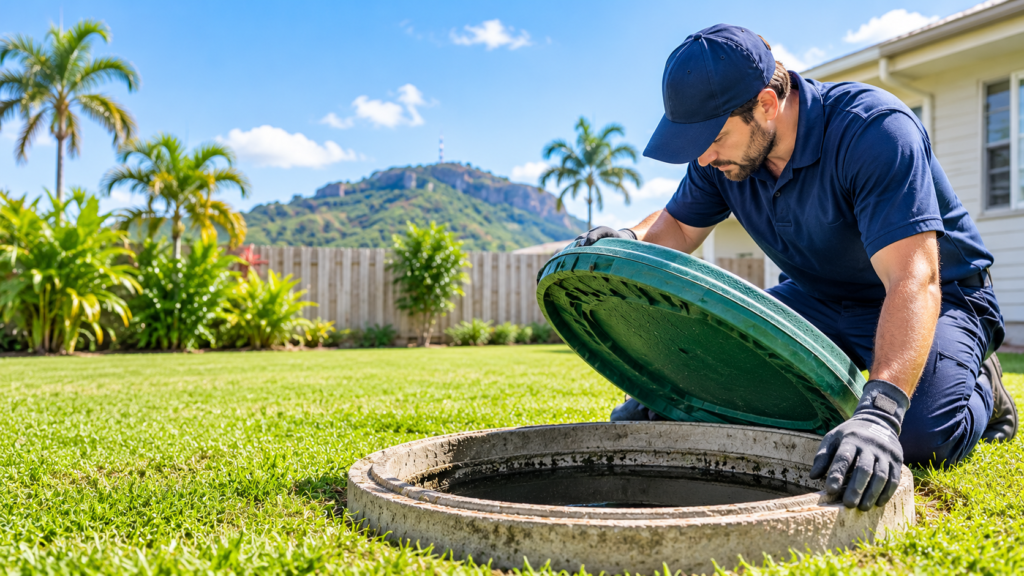
Your septic tank takes everything that goes down the drains in your home, from the toilet to the kitchen sink to the washing machine, and breaks it down so the water can soak back into the ground. It can keep doing this for years without any trouble, as long as you stick to a few good habits and keep up with some light septic tank maintenance. We’ll start with how to make things safe and how quickly you need a plumber if your drains have already backed up, then take you through the habits and checks that stop it happening on a random Tuesday. Work Out How Urgent Your Septic Problem Is Some septic problems need a plumber in the middle of the night, but plenty of them can wait a day or two. The signs you’re noticing will tell you which of those you’re dealing with. When to call a plumber ASAP Any of these means the problem can’t wait until morning: While you wait for the plumber, stop using water in the house altogether. Every flush, shower or load of washing goes into a system that already has nowhere to send it, which means it comes straight back up through your drains.  Keep the kids and pets inside as well, because sewage carries bacteria that can make them sick.  And if you’re tempted to lift the tank lid and see what’s gone wrong – DON’T. The gases that build up inside are too dangerous to breathe, so leave that to your plumber when they arrive. Book a plumber within a day or two These signs mean your system is struggling. It can usually hold on until a plumber gets to you, but the problem will keep growing the longer you leave it: Until the plumber has been, go easy on water so the tank has less to deal with. And if your blower isn’t working, keep everyone off the sprinkler area too, since that water is going out untreated. Our plumbers are on call 24/7 across Townsville for septic tank emergencies, and when the problem can wait, we can book you in for a visit in the next day or two. Get in touch with our team today! Build Daily Habits That Keep Your Septic System Flowing Your septic tank relies on bacteria to break down everything your household sends its way, so the healthier you keep them, the better your whole system works. Most of that comes down to small things you do around your home each day. Only flush toilet paper and human waste. Wipes, cotton buds and sanitary products hold together far longer than toilet paper does, so they collect in the pipes and the tank until they cause a blockage. That includes wipes labelled “flushable”, which take much longer to break down than the packet suggests. Put fats and oils in the bin. Cooking fat runs down the sink easily while it’s hot, but once it cools in the pipes and the tank, it sets hard and narrows the pipe a little more every time. Let it cool in a jar or container first, then throw it out with the rubbish. Choose gentle cleaning products. Bleach-heavy cleaners and chemical drain openers kill the bacteria your tank depends on, so it can’t break down waste as well as it should. A bit of bleach for everyday cleaning is fine in normal amounts, but if a drain blocks, use a plunger or drain snake to clear it instead of pouring a bottle of drain cleaner down the sink. Spread your washing across the week. When you run several loads back to back, a rush of water flows into the tank before the solids have time to settle, and it carries some of them out into the trenches, where they clog the soil. So keep it to one or two loads a day, as that gives the tank time to catch up. Keep cars off the trenches and irrigation area. Your trenches and sprinkler lines sit just under the lawn, and the soil around them needs tiny air gaps for wastewater to soak into. The weight of a car or trailer squashes those gaps closed and can crack the pipes, which leaves the water with nowhere to go but back up to the surface. Check Your Septic System Every Few Months Your daily habits do most of the work, but a quick look over the system a few times a year helps you spot the small changes you’d never notice from inside the house. Clean the outlet filter Many standard septic tanks have a filter at the outlet, where the liquid leaves the tank on its way to the trenches. It catches the bits of solid waste that would otherwise clog the soil, so it slowly fills up, and once it’s blocked, the wastewater has nowhere to go but back toward the house. Most manufacturers recommend a clean about every three months, which keeps the water moving. Keep your face back while you work, because gases still build up inside, and never lean or reach down into the tank itself. If your tank doesn’t have a filter, or you’d rather not do it yourself, your plumber can clean it during a septic tank maintenance visit. Walk over the trenches or irrigation area The patch of yard where your wastewater soaks away is usually where problems show up first, so take a walk over it every now and then. As you go, look out for: You can trim back smaller growth yourself, but leave the bigger trees for a plumber to check, since a shovel in the wrong spot can crack a pipe. If you have an AWTS, make sure the sprinkler heads aren’t blocked or buried under grass, and keep that part of the yard as open lawn in full sun, which helps the treated water dry off and soak away. Check the lids and the AWTS panel While you’re out in the yard, give the
Plumbing

How to Fix a Leaking Shower Head (and When to Call a Plumber)

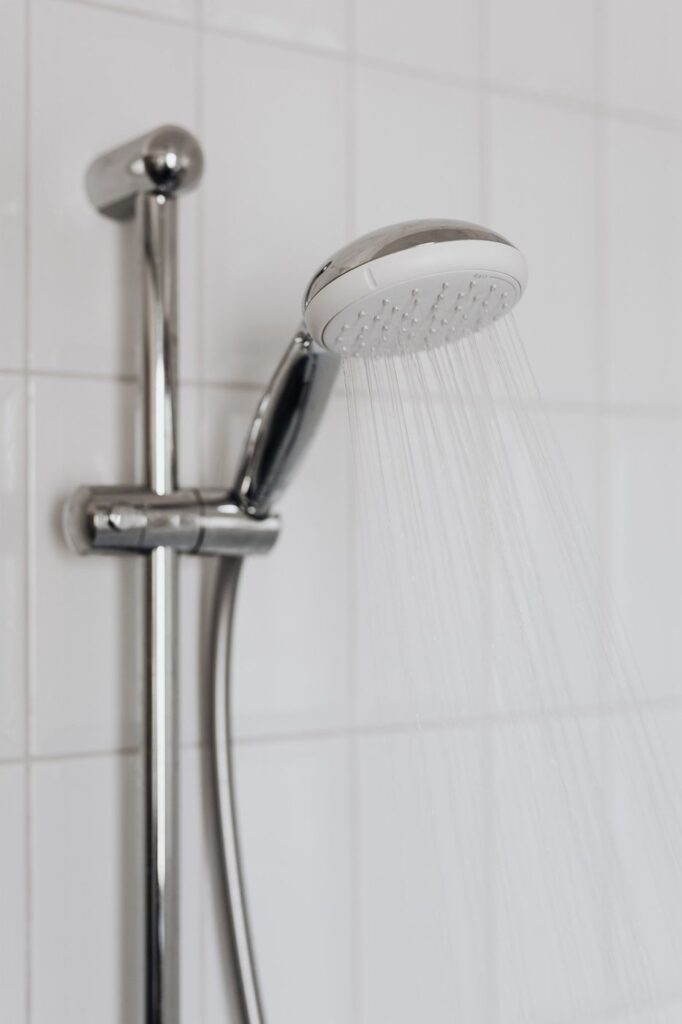
You’ve turned the taps off, the shower’s done, and yet the shower head keeps on dripping. One drop, then another, landing on the shower floor long after you’ve walked away. It’s the kind of small, steady leak that’s easy to live with for a day or two, but it gets on your nerves fast, and it doesn’t feel big enough to justify calling a plumber out. The good news is that most of the time, you don’t need to.  A leaking shower is usually something you can fix yourself with a few basic tools and a quick trip to the hardware store. The key is knowing which part to replace, because without that, you can easily spend an afternoon on the wrong fix while the drip carries on. So the first step is tracing the leak back to where it starts. Once you know which part has worn, the fix itself is usually straightforward, and you’ll have the bathroom quiet again before the day’s out. TL;DR Find What’s Causing Your Shower Head to Leak Where the water appears tells you which part has worn. So, run the shower for about a minute, then turn it off, and then check each connection in order with a dry cloth or paper towel. What to look for while the shower runs Keep the water running and check these three spots in order: What to look for when turning the taps off Check that the taps close properly. If the handle turns fully while water keeps running, or spins freely without shutting off, it means the internal shut-off part, often a worn spindle or cracked ceramic cartridge, has broken. At this point, your shower taps can no longer control the water, so use the main stopcock at the water meter to shut off the supply. In Townsville, water meters are usually near the front boundary of the property, often close to the left or right corner. Important: Closing the main stopcock cuts water to the whole house, so fill a few bottles or the kettle first if you need drinking water. What to look for after the shower is off Once the water is off, keep watching the shower head for a few minutes. A few drips that stop within a minute or two are just water draining out of the head and arm. That is normal. But if that drip carries on or returns later, that tells you the water is getting past a worn part inside the tap, even with the handle fully closed. A slow drip like this can usually wait for a daytime fix, though it does waste water. You may be wondering if you can fix it yourself. The answer depends on your tap type. Turn the handle off and notice how far it goes. A full turn or more means a rubber washer, which you can swap yourself. A quarter or half turn, or a single lever, means a ceramic cartridge. That needs a plumber. We have covered both in detail for you in the fix section below.  Fix Your Leaking Shower Head Based on the Cause Identified If you have already found where the leak is coming from, you can go straight to the fix for that part. But before you start, cut the water supply.  For work on the shower head, you can do that by simply closing the shower taps firmly by hand. And if you need to take a tap apart, shut off the water to the whole house first using the main stopcock at the water meter, and leave it off until the tap is back together. Fix a leak where the head meets the arm The shower arm is the pipe that sticks out of the wall. Your shower head screws onto the end of it. Inside the nut at the base of the head sits a small rubber washer, which presses against the arm to seal the joint. The thread on the arm is also wrapped in plumber’s tape, which fills the gaps between the threads. Both parts wear out over time. When either one goes, water dribbles or sprays from the joint. To fix it: Some shower heads have a small water-saving disc at this joint, and if that disc is crooked, it can cause the same leak. So seat it flat, and the leak will stop. If the head itself is cracked or worn out, then you’ll need to replace it. QBCC lists replacing a shower head as unregulated work, so you can do it yourself. Fix a leak from the shower hose Start with the nut at each end of the hose. Make sure both are hand-tight. If water still leaks at either end, that tells you the rubber washer inside has worn. And if you see water along the length of the hose, it means it has split, and the whole hose needs replacing. Unlike replacing shower heads, QBCC doesn’t list this as unregulated work; that means you need a plumber for it. At Emergency Plumbers Townsville, we’re available 24/7 for call-outs. Ring us anytime to have your leaking hose fixed, and we’ll aim to reach you in under 30 minutes.  Fix a constant drip from the shower head A constant drip from the shower head comes from the tap. Every tap has a seal inside that stops the water when you turn it off, and once that seal wears, water slips past and drips out through the shower head. Showers have one of two types of tap, and each uses a different seal. Turn the handle off and notice how far it goes: Full-turn taps: sealed by a rubber washer Start by finding which tap is leaking. Feel the water as it drips – if it’s warm, that points to the hot tap, and cold water points to the cold tap. Don’t rely on which side the tap is on. QBCC lists replacing a tap washer or jumper valve as unregulated work, so you can

Plumbing

How to Clean a Sink Drain Yourself, and When Not To

A sink that drains a little slower each week is easy to live with, right up until water starts pooling around the dishes or a sour smell drifts up from the plug hole. Most of the time, the cause sits just a few centimetres below the plug, where grease, food scraps, hair and soap build up with everyday use. You can easily clear it with a proper clean and don’t even need any special gear. We’ll take you through it step by step.  Work out what’s built up in your sink drain Grease, hair, and soap each need a slightly different clean, so you’ll want to know what you’re dealing with before you start. Luckily, your sink usually gives it away very easily. Just see which sink is slow, and the kind of smell coming up from the plug hole, and it will tell you a fair bit about what’s sitting in the pipe. Kitchen sink draining slowly, with a greasy or sour smell: Fat, oil and tiny food scraps slip down the plug hole every time you wash up. As the fat cools, it sticks to the inside of the pipe and catches more scraps on their way past, so the opening narrows a little more each week. Bathroom basin draining slowly: Hair is usually behind this one. It wraps around the plug and the short stretch of pipe beneath it, and soap and toothpaste bind it into a sticky clump that holds the water back. Musty smell from the small hole near the top of the basin: That hole is the overflow. It leads to a narrow channel inside the basin that runs down to the drain, and soap scum and grime collect in there out of sight until they start to smell. Sewage smell from a sink you rarely use: The bend in the pipe under every sink holds a little water, and that water stops drain air from coming back up through the plug hole. When a basin in a spare bathroom or granny flat sits unused for a few weeks, the water dries up, and the smell finds its way in. Several sinks or the shower slow at once, gurgling, or water coming up outside: When more than one fixture slows down at the same time, no single sink is to blame. The blockage sits further down the drain that carries all your household wastewater, out of reach of anything you do at the sink. Most of the time, you can fix the first four easily with a good clean, and we’ve discussed the steps for each below. The last one, though, will need a plumber. 4 Common sink drain build-ups and how to clean them Now that you know what’s built up in there, you’re ready to tackle the clean. Better still, all of it happens from the top of the sink, at the plug hole and around the basin, so you don’t have to empty out the cupboard or undo any pipes underneath. 1. How to clean a greasy kitchen sink drain Fat can be stubborn once it sets, but it softens quickly with a bit of heat, which makes the kitchen sink one of the easier drains to clean. One round usually clears a sink that’s only a little slow. If water still sits in the basin afterwards, give it another go or two, and let the detergent rest in the pipe for a few minutes each time before you run the tap again. 2. How to clean a bathroom sink drain  As you know, hair is usually the culprit here – thankfully it doesn’t get far. It tends to snag on the plug long before it travels down the pipe, so you can reach almost all of it from the top of the basin. Most bathroom basins have a pop-up plug that comes out of the plug hole with a twist, a firm pull, or by loosening a small rod at the back of the tap. Once it’s out, you’ll likely find a grey, soapy tangle of hair wrapped around its stem. With the hair gone, the water should drain away freely again, and you’ll notice the difference the next time you brush your teeth. 3. How to clean a smelly sink overflow That small hole near the top of your basin is easy to ignore, which is exactly why grime gets the chance to settle in. Each time water spills into it, it carries a little soap scum along, and over the months that coating builds up inside the channel until you start to notice the smell. Once the channel’s clean, that musty whiff should go with it. 4. How to get rid of a sewage smell from a sink you rarely use It’s a bit baffling when a sink you barely touch starts to smell, and so you naturally assume something has built up in there and gone off from sitting unused. But really, there’s nothing in the pipe at all. The smell is simply drain air drifting up through the plug hole, because the water that normally sits in the bend under the sink, and blocks that air, has dried up. The fix is as simple as putting that water back. The smell should clear soon after. If it keeps coming back within a day or two, even with the tap running regularly, the water isn’t staying in the bend, and that points to a fault in the pipework. That’s a job for a plumber, and our team at Emergency Plumbers Townsville is available 24/7 whenever you need us. Call a plumber when your sink stays slow even after a clean  If your sink still drains slowly after a good clean, the blockage sits further along the pipe, well past anything you can reach from the plug hole, and that’s the point where you’ll need a licensed plumber to clear it. You might want to grab a bottle of chemical drain cleaner at this point, but many

Plumbing

Hot Water System Leaking? How to Find the Source and What to Do Next

You’ve spotted water around the base of your hot water system, a dripping pipe, or a wet patch nearby, and you’re right to look into it. The good news is that not every leak means trouble. Sometimes a small amount of water is just your system working the way it’s meant to. Other times, it’s a sign of a failing tank, a loose fitting or a faulty valve that will only get worse if it’s left. This guide will help you work out which one you’re dealing with, what to check, and how urgent it really is, so you know whether to ring a plumber straight away or whether it can wait until Monday. TL;DR First of All, Stop the Leak and Make It Safe If your hot water system is leaking, the biggest risk is water near electrical parts. Work through these steps in order. Each one takes a minute or two. Important to note, turning off the hot taps inside the house is a common mistake. It does nothing to stop the tank refilling. The isolation valve is the one that counts. Once the system is isolated, you’ve bought yourself some time. Now, finding the source of the leak will help you decide how urgently you need the plumber to come. Find the Source of the Leak Where the water appears and how often it happens will tell you what you’re dealing with. Then you can decide whether to book a repair for later, or call a plumber right away. Water Dripping From the Relief Valve Overflow Pipe Look for a pipe near the top or side of the hot water tank and ending a short way above the ground. If water drips from the end of it, that’s your relief valve (also called the TPR valve) releasing water. In many cases, this is normal. As the water in the tank heats up, it expands, and the TPR valve lets a little out to keep the pressure at a safe level. If your system has an expansion control valve (ECV) on the cold-water inlet, you may see that valve releasing the water instead. What matters is how much is coming out and for how long. What you can do yourself Watch the pipe while the tank is heating. A small drip that stops once heating has finished is normal, and as a guide, discharge of roughly 1/50 of the hot water used is within the expected range. If it keeps dripping after heating has stopped, and your manufacturer’s manual allows it, gently lift the TPR valve’s easing lever for a few seconds, then lower it slowly. This can sometimes clear minor debris from the valve seat. Stand clear of the drain outlet, as the water may be hot enough to burn you, and never force the lever or let it snap shut. When to call a plumber If the dripping still doesn’t stop, book a plumber. The cause is usually a worn valve, debris that won’t clear, supply pressure that’s too high, or a faulty thermostat letting the water overheat. They may replace the TPR valve, check the thermostat and temperature settings, inspect the ECV if you have one, or test your water pressure. Under AS/NZS 3500.1, static pressure at outlets inside a building should not exceed 500 kPa, so if yours is higher, they may install or adjust a pressure-limiting valve. Don’t wait if you see a constant stream of very hot water, steam, or water escaping quickly. Call a plumber straight away. Our team at Emergency Plumbers Townsville is on call 24/7 for exactly these situations, and we’ll have a plumber at your place in under 30 minutes, day or night. Condensation and Heat Pump Drainage Water on cold pipes, around the unit, or in the tray and on the ground below can look alarming. Usually it’s condensation, and that’s normal. Townsville’s humid, tropical climate can make condensation more noticeable, so it’s easy to mistake for a leak. Heat pumps also produce condensate as part of normal operation, and it drains continuously through a condensate line. Water from that line, or dripping from cold pipes, is expected. If the water only ever shows up on cold pipes or the condensate line, you can relax. What you can do yourself Dry the area, then watch where the water reappears. If it follows humid weather or the heating cycle and comes from the condensate line, it’s likely normal. You don’t need to do anything. When to call a plumber If the water is coming from the tank, a fitting or a valve, you’re dealing with a leak. Work through the other causes in this section to find the one that matches, and each one tells you when to ring a plumber. Water at the Base or Pooling Under the Tank If you notice a puddle under the tank, damp flooring, rust stains, or moisture low down on the tank, the water could be coming from the drain valve, a fitting or pipe connection, or the tank itself. Start by checking the drain valve. On systems that have it, it sits near the base. If it’s been left slightly open or its washer has worn, water can seep out and look a lot like a leaking tank. The other, more serious possibility is the tank. Most storage tanks have a sacrificial anode, a metal rod that corrodes so the tank doesn’t. Once the anode wears out, the tank takes the damage instead, and over time the inner cylinder can rust through. Water seeping from the tank body, rust staining, or pooling with no valve or fitting nearby usually points to this. What you can do yourself Check that the drain valve is fully closed. Then have a look over the tank and pipework to see where the water seems to come from, without touching any electrical parts. When to call a plumber If the drain valve is fully closed and water still seeps from it or from a

Plumbing

How to Fix a Running Toilet: What You Can and Can’t DIY

You’ve flushed, the cistern has filled back up, and the water still won’t stop running.  Where that water ends up running to tells you a lot about whether you can fix it yourself, if so, how, and if not, how long you have to call the plumber before it floods your bathroom. Usually, if the water’s running into the bowl, the problem is almost always inside the cistern, and that’s a quick fix you can do yourself. But if it’s pooling on the floor, that’s a job for a plumber. So before you book anyone, lift the cistern lid and try the checks below. There’s a good chance you’ll have it sorted in a few minutes. TL;DR: 1. Turn off the isolating tap behind the toilet Before you take the lid off, cut the water supply to the cistern so it doesn’t keep refilling while you’re trying to work out what’s wrong.  Every toilet has its own isolating tap for this, usually on the wall just behind or beside the cistern. Turn it clockwise as far as it goes, and it will stop the running. Most of these taps go years without anyone touching them, so it might feel a bit stiff. If it’s too stiff and won’t turn with a little force, leave it as is because older taps can snap. If the tap won’t turn, or the water is leaking from the tap or the hose under the cistern, shut off the whole house at the main stopcock instead. You’ll find it at your water meter, usually near the front left or right corner of the property.  2. Lift the cistern lid to see where the water is going With the water off, lift the lid off the cistern and set it down somewhere safe, like on a folded towel, because it’s ceramic and cracks easily. On some cisterns, you’ll need to unscrew the flush button first before the lid comes free. Inside, there are two main parts to know about: Nearly every running toilet comes down to one of these two not closing properly. To find out which one, turn the isolating tap back on for a minute and watch what the water does. 3. Fix your running toilet based on what’s causing it In Queensland, most plumbing work has to be done by a licensed plumber, but a few small cistern repairs are an exception, and anyone can do them. That covers freeing or adjusting the float, and replacing the float valve washer or the rubber seal on the outlet valve.  But replacing a whole valve, the hose, or the isolating tap is licensed work. Because a small mistake with any of these parts can turn into a slow leak that damages your floors or walls, and your insurer may not cover the damage if they find unlicensed plumbing work behind it. So while it may look like the job itself is too small to call a plumber for, what’s at stake if it goes wrong is not.  For each situation discussed below (matching signs found in the cistern check), we’ve covered what you can safely sort out yourself and when it’s better to leave it to a plumber. 1. Water running down the overflow pipe: the inlet valve isn’t shutting off The inlet valve relies on the float to tell it when to stop. As the cistern fills, the float rises with the water, and once it reaches the right height, it closes the valve. If the float catches on the side of the cistern or the flush button rods, or it’s set too high, the valve never gets that signal. The water keeps rising until it spills into the overflow pipe.  The same thing happens when the small rubber washer inside the valve wears out, because the valve can’t seal properly even with the float in the right spot. Check the float first This is the easiest thing to rule out, so start here. Replace the washer if it’s still running If the float moves freely and the water still won’t stop, the washer has most likely worn out. When to call a plumber If a new washer doesn’t stop the running, the inlet valve itself has worn out and needs replacing, which must be done by a licensed plumber in Queensland. The good news is that it can wait until morning. With the isolating tap off, the toilet isn’t wasting any more water, so you can book a daytime visit and avoid the after-hours call-out fee. Contact our team at Emergency Plumbers Townsville anytime, and we’ll come out the next day, whenever suits you, to fit a new valve. Just don’t leave it for weeks, because a leaking toilet wastes water around the clock and adds to your water bill. 2. Water seeping into the bowl: the outlet valve seal has worn The outlet valve has a rubber seal at its base that sits tight against the bottom of the cistern between flushes. Over time, that rubber perishes and loses its shape, or a bit of grit gets underneath and stops it sitting flat. Either way, water slips past it into the bowl, and the inlet valve keeps topping the cistern back up. That’s the faint hiss and refill you might hear every so often, even when nobody has flushed. Clean the seal first Sometimes the seal is fine, and something is just stopping it from closing properly. Replace the seal if it’s still leaking If the rubber looks cracked, flattened, or has gone hard, a clean won’t be enough. The seal is just a rubber ring around the base of the valve, so with the valve out, pull the old one off, take it to the hardware store to find a match, and push the new one in its place. When to call a plumber If you’ve fitted a new seal and water still gets through, the outlet valve itself is likely cracked or warped and needs replacing. That’s a job

Plumbing

How Long Does a Hot Water System Take to Heat Up

You’re halfway through a shower when the water goes lukewarm. Or the new system went in this morning, and the hot tap is still running cold. Or it just seems slower than it used to be. Either way, the question is the same: how long does a hot water system take to heat up, and is yours taking too long? The short answer: most systems take anywhere from 30 minutes to several hours. Where yours sits depends on the system type, tank size, your electricity tariff, and the surrounding conditions. But “heat-up time” actually means three different things. Mixing them up is why so many people think their system is failing when it isn’t. Let’s sort that out first. What to Expect From Each Type of System If you’ve just had a new system put in, or the power’s been out, you’re waiting for a whole tank of cold water to heat up. That’s full heat-up time, and it’s the longest wait your system will ever give you. Day to day, though, what you really care about is how quickly the tank bounces back after everyone’s showered. That’s recovery time, and it’s what decides whether the last person in gets a hot shower or a cold one. And if you’re standing at the kitchen tap waiting for the water to warm up, that usually isn’t the heater. It’s tap delay: cold water sitting in the pipes between the system and the tap. The further away the tap is, the longer you wait. So when we talk about how long a system takes, recovery time is what counts, and the type of system makes the biggest difference. Gas Storage Gas is the fastest tank option, and a typical gas storage system can reheat a full tank in under an hour. For example, Rheem’s 155-litre gas model reheats around 185 litres of water an hour. Topping up after a couple of showers takes much less than that. Electric Storage Electric systems heat slowly and steadily. Expect a recovery time of around 1–2 hours, so a 150-litre electric tank takes noticeably longer than a gas tank of the same size. On an off-peak tariff, the wait can be even longer. We’ll explain why further down. Heat Pump Heat pumps are the most efficient option, but they recover more slowly and can take several hours. They work by drawing warmth from the surrounding air, so the cooler the air, the longer they take. That’s where Townsville has an advantage: warm air for most of the year helps a heat pump do its job. Solar Solar systems rely on the sun, with an electric or gas booster filling the gaps. Townsville’s wet season runs from October to April, and the heaviest cloud usually comes between late December and March. That’s when the booster does more of the work. Leave it switched on: Queensland Government health advice is not to turn boosters off on cloudy days. Continuous Flow Continuous flow systems (also called tankless) heat water as it passes through, so there’s no tank to heat and no recovery time. Any wait at the tap is tap delay, not the heater. Those are the typical numbers. In your home, the real figure also depends on a few other things: tank size, how many people are using it, and even which electricity tariff you’re on. None of them mean something’s wrong, but they explain why your system might not match the times above. What Affects Heat-Up Time Here’s what we look at first when a system seems slow. Tank Size and Household Demand A bigger tank holds more hot water, but it also takes longer to heat from cold. And no tank keeps up if everyone showers back-to-back while the dishwasher and washing machine are running. Practical tip: spread the load. Run the dishwasher or a hot wash after the morning showers rather than during them. If you run out at the same point in your routine every day, the system is probably working fine and is just too small for your household. Energy Source and System Power Gas, electric, heat pump, and solar systems all heat water differently, and even two systems of the same type can differ in power. A higher-rated element or burner heats the same volume faster. Practical tip: check the label on the side of your tank. It lists the capacity in litres and the power rating, which tells you what your system was built to do. Off-Peak Tariffs This catches many Townsville households out. Many electric systems run on an economy tariff, where Ergon Energy supplies power to the hot water only during certain hours, and those hours can change day to day. On Tariff 31, if the tank runs out at 7 pm, it won’t reheat until the next heating window, usually overnight. That’s not a fault. That’s the tariff doing exactly what it’s designed to do. Practical tip: check your electricity bill. It lists your hot water tariff separately. If you’re on Tariff 31 and running out most evenings, ask a licensed electrical contractor about moving to Tariff 33 for more heating hours. Incoming Water Temperature The colder the water coming into your tank, the more work the system has to do. In warm climates, supply water usually comes in warmer, which shortens heating times. Temperature Setting Queensland law requires hot water tanks to store water at 60°C or more to control Legionella bacteria. A valve then mixes the water down to 45–50°C before it reaches your bathroom taps. Practical tip: don’t turn your system down to make it heat faster. It’s unsafe, and only a licensed electrician should adjust the thermostat. If the water at your taps feels too hot or not hot enough, get it checked rather than adjusting it yourself. None of these factors mean your system is broken. But if a system that used to keep up suddenly can’t, the water won’t get hot at all, or you notice water pooling around the tank,

Plumbing

Townsville Plumbing Emergency: What to Do Fast

When a pipe bursts or sewage backs up in your Townsville home, the first 30 minutes determine whether you are looking at a quick fix or thousands of dollars in wall and flooring repairs. A true plumbing emergency is any sudden failure that threatens your property, health, or access to essential water (including burst pipes, raw sewage overflows, live electrical water hazards, and total water loss).  If you are here because water is already pooling, read on: we will walk you through exactly what to do step by step, clear up your doubts, and show you how to handle the situation safely until professional help arrives. TL;DR: Emergency Action Checklist Step 1: Stop, Assess, and Protect Yourself When water is actively damaging your home, take a breath and quickly check what is happening right in front of you. Forget about a permanent fix for a minute; your only job right now is tracking down immediate hazards before calling for professional help. Scan the room for the big red flags: In Townsville, heavy wet-season downpours and humid conditions mean that trapped moisture behind walls or ceiling cavities spreads lightning-fast, turning a minor leak into major structural rot within hours. If you spot electrical risks, gas leaks, or a sagging ceiling, leave the area immediately. Surface water is only half the problem; hidden threats like live electrical shorts and contaminated wastewater can turn dangerous before you even realize it. Stay safe, keep your distance, and call a licensed professional to handle the heavy lifting. Step 2: Shut Off the Water Supply Stop the water at the closest isolation valve first if the issue targets a single fixture or appliance, like a toilet, basin, dishwasher, or washing machine. This cuts the flow instantly without shutting down the entire property. If you are dealing with a burst pipe, a major leak, active flooding, or an unknown source, kill the main water supply straight away.  In typical Townsville properties, the main shutoff sits near the front property boundary beside the water meter. Once the water is off, open the lowest cold tap in the house to relieve pressure and drain out the remaining lines. Step 3: Protect People From Electrical or Gas Hazards Prioritize safety over cleanup. Step 4: Contain the Damage While You Wait Once the area is safe, slow the spread of water by grabbing buckets, towels, or storage tubs to catch drips and redirect moisture away from flooring and furniture. Immediately clear rugs, electronics, chargers, and small personal items out of the wet zone. If water drips through a ceiling, never stand under a sagging section or attempt to cut into plaster yourself. You can apply temporary fixes like leak tape, a firm wrap, or a clamp to slow a minor leak, but treat these strictly as short-term stopgaps that never replace a professional repair. Step 5: Turn Off Related Systems if Needed Some emergencies involve more than just the water supply. If you have cut the main water and the issue affects your hot water system or nearby pipework, turn off the water heater too to prevent overheating, pressure issues, or added damage. For electric storage systems, kill the power at the unit or switchboard only if the area is completely dry. For gas systems, follow manufacturer shutdown instructions or wait for a professional if you feel unsure. If a sewer or drain line is backing up, stop using all sinks, showers, toilets, washing machines, and dishwashers. Every extra litre sent down the drain forces more contaminated wastewater back into your living space. Step 6: Tell the Difference Between an Emergency and a Routine Fix Step 6: Decide Whether It Is a True Plumbing Emergency Some plumbing issues demand immediate professional help, while others can safely wait until morning once isolated. Call a professional right away if you notice: These critical situations destroy walls, floors, and electrical frameworks within minutes while creating severe health and sanitation hazards. When Your Plumbing Issue Can Wait Until Morning A slow drain, a minor leak under a sink that stops at the isolation valve, or a single blocked toilet that isn’t overflowing can usually wait if you have alternative facilities and the situation remains stable. These problems still require professional attention, but they rarely justify an expensive after-hours callout as long as you keep the fixture shut off and the surrounding area dry and safe. If you feel uncertain or notice the issue worsening, calling a trustworthy emergency plumber like Emergency Plumbers for guidance is always your safest bet. Step 7: Know What Information to Have Ready When You Call When you dial, keep the details clear and practical to ensure the crew arrives fully prepared. Provide these exact facts to the dispatcher: Sharing these details upfront eliminates guesswork, so the team can arrive with the right tools, replacement parts, and safety gear to protect your home. Step 8: Document the Damage for Insurance and Repair Clarity Once you’ve contained the immediate danger, take clear photos and short videos of the leak source, affected walls, and damaged flooring. Capture soaked contents and any standing water before cleanup begins to support future insurance claims. Jot down a quick timeline noting when you spotted the issue, when you closed the valves, and the exact time you called for help. This evidence helps your insurance adjuster and gives your plumber a precise record of how the event unfolded. Always put safety and water shutoff first; never delay critical actions just to take pictures. If you rent your property, responsibilities can vary by issue. Read our Tenant vs. Landlord Plumbing Responsibility Guide to understand exactly who covers emergency repair costs. Step 9: Avoid Common Mistakes That Make Emergencies Worse Never pour chemical drain cleaners into blocked pipes or overflowing fixtures while waiting for help. These harsh chemicals can degrade pipework, react dangerously with standing water, and burn anyone working on the line. Avoid ignoring minor leaks that spread silently into walls, cabinetry, or subflooring, and never attempt DIY

Plumbing

How to Turn Off Your Water Supply in an Emergency

A burst flexi hose, split pipe, overflowing toilet, or failed tap can send water through your home in minutes. When that happens, knowing how to turn off your water supply quickly is what limits damage to flooring, cabinets, walls, electrical fittings, and everything around them. In this guide, we’ll walk you through exactly what to do: how to shut off the water safely, where to find the main shut-off valve, and what to do right after the water stops. Why Knowing Your Water Shut-Off Point Matters When water sprays from a burst line or soaks through your floors, every second counts. Standing helpless while water pools across skirting boards, ruins cabinetry, and creeps toward power points is a stressful experience no homeowner wants. In humid regions like North Queensland, where high ambient moisture levels already keep building materials near their saturation threshold, an active leak accelerates damage rapidly. Porous materials, wall cavities, and timber structures trap that moisture, turning a minor pipe failure into expensive structural repairs or hazardous mould growth if you don’t stop it immediately. Knowing how to turn off your water supply is the critical first step to halt the spread. However, stopping the water is only part of the job: call an emergency plumber immediately. Skipping professional help leaves underlying pipe fractures, damaged fittings, or weakened seals unaddressed—risking a catastrophic blow-out the moment you restore pressure. Knowing your water shut-off point also matters beyond emergencies. It is essential for routine plumbing work, like replacing a tap, fixing a toilet valve, or changing a dishwasher or washing machine hose, saving time and preventing household chaos. Start With Safety Before You Touch the Valve Before you rush to shut off the water, pause to assess your surroundings. Reaching for a valve without checking for hidden hazards can turn a plumbing emergency into a serious safety crisis. If Water Is Near Electricity Water conducts electricity. If leaking water has pooled around power points, electrical appliances, extension cords, or your main switchboard, treat that as an immediate electrocution hazard. If the Valve Is Stuck or Corroded Outdoor and older valves are often exposed to dirt, moisture, and mineral buildup, which can cause them to seize. Find the Main Water Shut-Off Valve When water is actively leaking, wasting time hunting for your main water shut-off valve lets damage spread through your floors and walls. Knowing precisely where to look saves critical minutes. Common Locations In most properties, the main shut-off valve sits outside rather than inside, positioned where the municipal supply meets your property. Start your search here: Some homes also feature an internal shut-off valve. Check these areas if you cannot find an external one: Special Setups Property layouts vary, meaning the valve isn’t always in a standard spot: What to Do If You Still Can’t Find the Main Valve If your search comes up empty and the valve is hidden or completely unlabelled, guessing while water is actively flooding your home is the worst option. Try these steps to uncover its location before an emergency hits: If you still cannot locate it, call a professional plumber to find the valve and label it clearly. Getting this sorted ahead of time ensures you are never left guessing when seconds count. When to Shut Off One Fixture Instead Not every plumbing issue requires shutting down water to the entire property. If a leak comes from a single component (such as a split flexible hose under a basin or a stuck toilet cistern valve), you can isolate the issue at the source. This stops the flooding immediately while keeping the water running to the rest of your home. Finding Fixture Isolation Valves Local shut-off valves (also called angle stop valves or mini-stops) control individual fixtures without affecting the wider household supply. You will typically find them positioned in these common areas: How to Close a Fixture Valve To shut off an individual fixture, turn the small oval handle clockwise until it stops, or rotate a mini-lever valve a quarter-turn so it sits perpendicular (at a 90-degree angle) across the pipe. How to Turn Water Back On Safely Once plumbing repairs are complete, you cannot simply throw the main valve wide open. Restoring water too quickly can send a violent shockwave through the system (known as water hammer), cracking brittle pipes or blowing out fresh seals. How to Restore Water Pressure Safely Follow these steps to bring your plumbing system back online safely: The Critical Next Step: Call an Emergency Plumber Shutting off the water and clearing pressure is only a temporary emergency measure. A licensed emergency plumber must inspect and repair the underlying issue before you turn your water supply back on permanently. Skipping professional help leaves the root cause—such as a degrading pipe, a fractured fitting, or a failing hot water cylinder—completely unaddressed. If you turn your water back on without professional repairs, the damaged component can fail completely under full mains pressure, triggering a catastrophic secondary flood when you least expect it. If you are facing an active plumbing emergency or need expert repairs completed before safely restoring your system, contact Townsville Emergency Plumbers right away for fast, reliable support.

Plumbing

Who Is Responsible for Blocked Drains: Tenant or Landlord?

Nothing ruins a Tuesday quite like watching your kitchen sink fill up with dirty, soapy water that refuses to go down. The immediate panic usually brings up two big questions: How fast can you get here? And who pays for this? If you rent a property or live in one, drain responsibility is one of those gray areas that often leads to headaches before a solution. As an emergency plumbing company, we get pulled into this landlord-tenant debate all the time. This guide sets out when a tenant is liable, when a landlord must cover the repair, and when the issue sits outside the property on the council or water authority side. It also explains how to sort out the dispute properly with plumber reports, CCTV drain inspection findings, photos, and written records. Who Actually Pays? The Short Answer Pinning down who pays usually comes down to identifying what caused the blockage in the first place. Landlords own the building’s infrastructure, so they cover structural defects, aging pipes, and deep-system failures, while tenants handle day-to-day use and keep bad habits out of the drains. A blockage can stem from a dozen different things, everything from invasive tree roots crushing an old clay line out in the yard to six months of bacon grease hardening in the kitchen bend. Even water-softener buildup or a misaligned pipe joint underground can trap grease and paper in a matter of weeks, turning a minor habit into a total blockage. That is exactly why we always drop a camera down the line before pointing fingers. An inspection cuts through the guesswork and shows you whether you are dealing with a tenant’s habit or a structural defect.  A quick CCTV look also tells us the pipe’s exact material; whether it’s old cast iron scaling up from the inside or modern PVC that just needs a quick hydro-jetting. When the Landlord Is Responsible: Structural Failures and Aging Infrastructure Sometimes, you can be the cleanest tenant on earth and still end up knee-deep in gray water because the building itself is rebelling. When a blockage traces back to structural failure, aging infrastructure, or straight-up wear and tear, the landlord owns the bill. These are property defects, not day-to-day use issues.  In older neighborhoods, invasive tree roots and cracked clay pipe joints love to wreck underground lines, especially after heavy wet-season rains saturate the ground and shift the soil. Here is the dead giveaway: repeat offenders. If the same toilet, shower, or yard drain backs up every few months, you are looking at a deep-seated property problem, not a one-off tenant mistake. Property Boundaries: Where the Landlord’s Pipes End and Yours Begin Think of it like property lines: everything underground that connects only your house to the main city sewer out in the street belongs to the landlord’s responsibility. If the clog is sitting in that private pipe running under your yard or kitchen floor, the owner pays to fix it, unless they can prove you shoved something down there you shouldn’t have.  The shared public network out on the main street is the council’s problem, not yours or the landlord’s. When a line backs up, keep these rules in mind: When a Tenant Is Responsible for a Blocked Drain Tenant responsibility kicks in when a blockage is directly caused by daily habits, misuse, or neglected minor maintenance rather than a structural failure of the building. Sometimes, plumbing failures start with what goes down the drain. Common culprits include: If a tenant notices slow drainage, gurgling pipes, or rising water levels and keeps using the fixture without calling for help, they turn a cheap fix into an expensive disaster. Paper Trails: How Quick Reporting and Records Protect Everyone Notifying your landlord right away gives them a chance to fix the issue before it ruins the floors. Sending a quick written message also creates a clear timeline, preventing later arguments about who knew what and when. A solid paper trail protects the tenant just as much as the landlord: If this whole mess eventually turns into a bond dispute or a fight over reimbursement, that exact paper trail is your best insurance policy. When It’s Neither: Shared Drains and City Water Authorities Not every blocked pipe belongs to the landlord or the tenant. Some drainage lines sit completely outside the property boundary or handle wastewater for multiple properties. How to Spot an Outside Issue If the blockage lies past your property line, or if your neighbors are dealing with the exact same nightmare (gurgling toilets, backing-up wastewater, or a foul sewer smell down the street), you are looking at a broader network failure.  The landlord may still need to help report it, but the city handles the repair bill. In North Queensland, external sewer lines take a heavy beating during intense wet-season storms.  If multiple homes on your street show the same drainage symptoms after heavy rainfall, check the neighborhood before pointing fingers at the rental house. How to Figure Out Who Pays (Without the Drama) When a rental drain backs up, everyone wants to point fingers, but you should skip the emotional argument and rely on concrete evidence to settle the bill: Real-World Scenarios: Hair Clogs, Wipes, Tree Roots, and Street Mains While these scenarios cover most emergency plumbing calls, real-world plumbing can still throw a curveball.  That is exactly why you need an experienced emergency plumber on site—to cut through the guesswork, pull out the camera, and give you the definitive proof you need before anyone gets stuck with a massive bill. When Nobody Wants to Pay: Resolving a Plumbing Stalemate Some disputes drag on even after the plumber leaves. A landlord might blame tenant misuse without proof, or a tenant might dig their heels in despite a plumber pulling a fistful of wet wipes from the pipe. When both sides refuse to budge, you need a structured path forward. In Queensland, start with the RTA’s free dispute resolution service and stick strictly to the evidence rather

Plumbing

No Hot Water? Emergency Causes & What to Check Right Now

Turning on the tap for a warm shower only to be hit with freezing water is an absolute nightmare, especially when you need to get your day started. When your hot water system suddenly flatlines, every second counts before the morning routine grinds to a halt. Most sudden hot water failures follow a predictable pattern. Before panic sets in or property damage spreads, you need to run a few critical checks to determine whether you are dealing with a minor glitch or a major emergency. In this article, we will walk you through a step-by-step triage guide to help you safely check your system, spot warning signs, and know exactly when to call the professionals. Can You Fix It Yourself, or Do You Need a Plumber? Before you start tearing into your hot water system, it helps to understand where the line is between a quick DIY fix and a job that strictly requires a professional. The goal of troubleshooting isn’t to become a water heater technician. It is simply to rule out minor external glitches so you don’t pay for a service call over a tripped breaker, and to recognize the exact moment you need to call in an expert. Check the basics first (power, gas, supply) Before assuming your system has completely failed, start with the simplest checks. Most sudden hot water issues come down to minor, easily missed factors that you can safely investigate first: If everything else works normally but the water stays cold, you’ve narrowed down the issue. Should you find a tripped breaker or unlit pilot, try a single safe reset. However, do not keep retrying if it fails to hold. If the breaker trips again or the pilot light refuses to stay lit, it points to a deeper electrical or gas fault. At that point, stop troubleshooting to avoid damaging the system. Check if It’s the Whole House or Just One Fixture Once you have ruled out basic power and supply issues, you need to diagnose the scope of the failure. Mapping out where the cold water is coming from gives you immediate insight into whether the issue is isolated to a single fixture or impacting your entire property. Take a few minutes to systematically test multiple taps across different rooms. Pinpointing an isolated fixture lets you skip tearing into your hot water heater and focus on repairing the specific valve or cartridge. However, if the entire house is freezing, you are dealing with a critical system-wide breakdown. When your entire property loses hot water and basic resets fail to revive the unit, stop troubleshooting and call an emergency plumbing company to dispatch an emergency technician before secondary complications arise. Check the thermostat settings If the system has power and affects the whole house, check whether the water isn’t heating at all, not just not heating enough. Thermostats control your system’s operational temperature, and they frequently drift or fail over time due to electrical wear. Start by inspecting the dial or digital panel, setting the temperature safely around 60°C to balance safety with performance. Give the system a solid hour to reheat the tank before testing your taps again. If the water remains freezing cold after a reset and temperature adjustment, stop tinkering. Internal failures like a broken thermostat switch or a burned-out heating element require expert intervention. Look for leaks around the system If the settings look right but performance still isn’t, check for anything physically affecting the system. Leaks are a common cause and can quickly turn a simple issue into a bigger one. Check: Even a small leak can reduce efficiency or signal internal damage, so it’s worth taking a close look. If you do find water, act early. Turn off the supply to limit further damage and avoid running the system unnecessarily. Leaks rarely resolve on their own. In most cases, this is where DIY stops and a plumber needs to step in before the problem spreads. Consider sediment build-up If your system looks fine externally and your supply and settings check out, the problem is likely hiding inside the tank where you cannot see it. Over time, calcium and magnesium mineral deposits—especially in hard-water regions—settle at the bottom of the tank and form a thick layer of sediment. This internal buildup creates major operational issues for your water heater: In this scenario, your water heater isn’t necessarily broken; it is simply choking on mineral accumulation. While flushing the tank can clear out the debris and restore performance, it is rarely a straightforward DIY job. If the drain valve is corroded or the unit hasn’t been flushed regularly, attempting it yourself can snap old valves and cause a massive indoor flood. If you suspect heavy sediment buildup or realize the unit hasn’t been serviced in years, it is far safer to let a professional safely flush and service the system. When to call a plumber If you have worked through the basic troubleshooting steps and the root cause of your cold water remains a mystery, this is the exact moment to put down your tools. Continuing to test or force components at this stage rarely solves the problem and heavily increases the risk of compounding the damage. Watch for these definitive warning signs that require expert intervention: These symptoms point directly to internal hardware failure, such as a burned-out heating element, a failed thermostat switch, faulty gas controls, or severe component wear. Once your hot water system reaches this stage, precise technical diagnosis matters far more than trial-and-error guesswork.  Calling a licensed professional ensures they safely resolve the underlying fault before a minor component failure escalates into a major replacement. Conclusion Losing hot water feels like an immediate crisis, but handling it comes down to knowing your limits and acting with a clear head. The true objective isn’t to become a master plumber on the spot; it is to quickly isolate whether you are dealing with a minor external glitch or a structural failure that demands professional repair.

Scroll to Top